Illegal character found in search text!
[Only A - Z, a - z and 0 - 9 are allowed]
...some advice if you are new to building websites...
Though it is not for us to decide how you will work with your n-gen.net CMS we suggest that you follow a few simple steps that might get you started the right way.
Depending on how much routine you have in creating websites following these steps might ease your work and result in a nice and easily maintainable website in a very short time.
But do remember that a good Content Management System (CMS) lets you focus on the important part: Creating, updating and deleting content.
Not even the best CMS can create quality content; the system is merely a mean for you to stay focused on creating the good content!
Creating a new website - getting started.
1. Start by defining a purpose for your website.
When defining a purpose for your website it might help to ask the question: "What effect should my website ideally have on the visitor?"
I.e. After visiting my site the visitor should:
- be inspired to make Ikea hacks; to make personal and customised furniture from cheap Ikea products,
- know how to recycle house hold plastic,
- promote bio diversity in urban areas,
- be aware that Donald Trump lives in an unreal parallel universe,
- buy more locally made clothes - preferably from your web shop,
- ...
If you know what the purpose of your web site and what desired effect it should have on the visitor it is much easier to stay focused and continuously provide relevant content. And it might be a lot easier to answer the next question - and thereby focus your content and functionality:
2. Who is the target audience of my new website?
With reference to bullet 1. you could expand your answers concerning your target audience like this:
- After visiting my site DIY folks and creative people should be inspired to make Ikea hacks; to make personal and customised furniture from cheap Ikea products,
- After visiting my site resource conscious and climate aware people should know how to recycle house hold plastic,
- After visiting my site children and young people living in built-up areas should promote bio diversity in urban areas,
- After visiting my site everyone with interests in a better world should be aware that Donald Trump lives in an unreal parallel universe,
- After visiting my site girls and modern women in the bay area should buy more locally made clothes - preferably from your web shop,
- ...
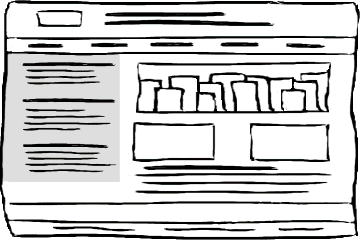
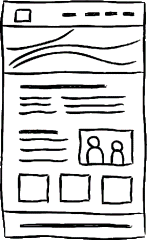
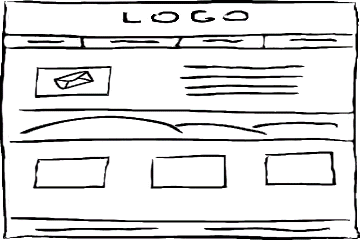
3. Start with an analog sketch before you create your digital design:
Draw a sketch by hand and pencil a few words or pictograms on a notepad.


- You might sketch the front page to get an idea of how you would prefer the front page to look like.
- Make some notes regarding the content: Find out what information should be on which page.
- Consider if you want all pages to have the same header or each pages should have its own individual header.
Or combine it so that all related pages should have the same header, but that header should differ from pages related to another topic.
- Consider if some of the pages are so much alike that it would make sense to use a template to give this specific category of information a uniform structure.
- If you discover that more pages are related you might consider to have your navigation menu containing sub-menus.
4. Establish the building ground: Register a domain, get a hosting plan or setup your own environment.

There is a few requirements for your setup - whether it is your own server or a commercial hosting:
- It should be capable of running Microsoft .NET,
- The web server should preferably be Microsoft Internet Information Service (IIS) ver. 7 or newer,
- You must have access to a MySQL / MariaDB or Microsoft SQL database server and have the privileges to create a new database (instance) for your website.
If you go with a commercial web hosting solution you must find a plan for a windows server.
5. Install n-gen.net CMS.

This task can easily be accomplished in a few minutes by following the procedure on the installation page.
6. Continue by focusing on the Header.
When you have installed your n-gen.net CMS (and you have performed the post installation tasks) do not be too keen to start working on your first page. In stead you should make the header of the front page as you would like it to appear. In some cases the default header is used so you can start by editing the default header. Alternatively you can create a new header and associate the front page with that header. In principle there is (almost) no limit of the number of headers. This means that if you want every page on your website to be associated with its own header that is absolutely an option. The content and thereby the height of your header should preferably not exceed 250 pixels. Remember that the more height your header has the less real estate you have for the (important) content part. You might try to make the height of our header somewhere between 90 px and 140 px. The page footer has a size of approx. 40 - 60 px. The height of your footer depends on your font size. So if you have a header of i.e. 250 px and a footer of 50 px and assuming your web page is displayed in a maximised browser on a HD monitor you will already have used roughly one third of the available space with the header and footer.
Note that the page header and page footer are not displayed on mobile devices so do not build too much functionality into your page header.
7. Templates
There is a good chance that some of the pages on your website will have a number of similarities in layout or in content or both. If that is the case you should consider making page templates. With a template - which is a user defined "stamp" that provide the same layout and content every time it is used - you will be able to save a lot of time and your site will get a coherent, consistent and uniform expression. In other words: Do not repeat yourself! With extensive use of templates and styles (using the style manager) you can maintain and expand even a very dynamic website with a minimum of effort and you will be able to focus on the content.
When you have made a page that should form the basis for new pages you can make that page a template with a single click from the page editing tool. Then you can open the Template Editor and refine the template. There is (almost) no limits for how many templates you can have on your site. But for the ease of use you can choose how many templates from your archive that should be active at any given time. Alternatively you can start the Template Editor with a blank sheet and simply build your template from scratch.
8. Now it is time to make web pages.
You have probably already familiarised yourself with the WYSIWYG editor.
If not then take a look at this video for a brief introduction.
Do not waste time by formatting text with different colours, sizes and fonts. Do not make your layout by sorting your content into tables. Focus only on creating the content: Structure and type the text and insert photos, images and graphics where appropriate. If your images are not ready in the right format or the right size insert an empty space and a descriptive text so you later on know what you want to insert.
If you have pages that have the same type of information you should consider to make a template out of the page. I.e. you are making a travel guide to cities. Most probably the pages will all have information about nationality, spoken language, currency, what to see and pitfalls to avoid. If you want to create a consistent look and structure to all your city guides then use the first one as a template. To make a template of an existing page is just a three click job.
9. Create the menu.
The navigation is essential to the visitor of your page. That is why the navigation should create a logical structure to your pages. And no information should be more the a couple of clicks or taps away from your front page. The navigation menu will often be a link to one of your pages. If the page already exist in the database you can simply pick it from a dropdown list when you create the menu item. However, if the page does not exist you will have to write the URL yourself. This is no big deal; it follows a simple syntax of /index.aspx?id=x where x is the id number of your page.
10. Test your work.
I takt med at du udvikler din hjemmeside bør du regelmæssigt kontrollere om den virker efter hensigten. Prøv at indlæse den på forskellige devices.
Teknisk kan du test med et værktøj du finder på her PageSpeed Insights (web.dev)
Post Installation
Post installation setup should be performed after completing sequence 1 - 4 (the green bubbles)
| Read the installation guide |
___________ |
Upload the install files |
___________ |
Create DB connection and DB tables |
___________ |
Fetch files from master repository |
___________ |
Post installation fine tuning |
Pre-conditions
- You have already read the installation guide
- The FTP service has uploaded the pre-installation environment,
- The connection to the database server has been established and connection information was written to the web.config file,
- The system files were created on your web server and the database tables have ben created and populated by initial data.
Now your n-gen.net CMS is installed and technically ready to be put into action. However, in order to secure your system and achieve Full Operational Capability you need to set some parameters - the Global Variables.
What you need to do is:
- Change Admin's password (or create a new user with Owner [level 4] privileges and delete the default admin account)
- Lock the Installer,
- Set parameters in Global Variables
If you know how to accomplish the above post installation it will probably take you less than two minutes. If you do not know - read on and you will be ready to perform post installation setup in approx. five minutes.
Read more about Post Installation Setup...